
Let’s get decreasing! This post looks at how different types of knit decreases look when they are stacked up, row after row, forming what we call ‘decrease lines’. If you are looking for specifics on how to work each type of decrease, check out our list of decrease tutorials here. Or if you’re looking for increase lines, check out our increase lines post here.
This tutorial includes:
- What’s a decrease and how do they work?
- Make your knitting unique
- Where do you find decrease lines?
- Paired Decreases
- Wrong side decreases
- Central Decreases
- More rapid decreases
- Extreme Decreases
- Decreases in pattern: Stripes
- There’s More Than One Way – choose your favourite, and experiment!

What is a decrease and how do they work in your knitting?
What is a decrease? It’s a method to take away one (or more) stitches from your needles, to decrease the stitch count. A decrease line is a point where these decreases stack up; that is, they’re worked adjacent the same stitch column, with a rhythm, like every row, every second row, every 4th or 6th row… you get the idea.
Nearly all knitting patterns include either decrease lines, or increase lines, or both. In a knitting pattern, if it’s more complex than a square of fabric, you’ll need to use decreases and/or increases to shape the fabric! By decreasing the number of stitches in a row or round, the width of the fabric piece you’re creating is decreased.

Using decrease lines to make your knitting unique
When I first fell in love with knitting, I IMMEDIATELY saw how many things could easily be adjusted about any designers’ pattern, to make the thing my own! I encourage you to take the same ‘design it yourself’ attitude about knitting patterns. Patterns are just tools, there to aid to your own creativity and creation, not something you need to follow by rote! So the next time you have a decrease line in a pattern you’re working, consider whether you’d like to ‘switch it up’ and explore other details.
Where do you find ‘decrease lines’ in knitting projects?
There are lots of places to find decrease lines in patterns. They can be part of the yoke shaping on a sweater or the decreases in a hat. Some spots are a little smaller and less obvious, like the shaping within in a lace stitch pattern.
Simple raglan sweaters, knit from the bottom up, like Boardwalk, Juniper, and Penny all have decrease lines that shape the raglan yoke.


The crown of a hat is most often shaped with decreases, often to stunning effect.


Sleeves knit top-down feature a decrease line (with decreases usually worked every 5th, 6th, 7th, or 8th row, the result is not as obvious a ‘line’ as with a shawl or raglan garment).

At waist / body shaping lines. The Trek sweater has waist shaping that involves a decrease line at the sides of the sweater.

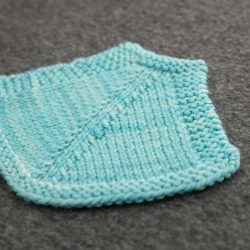
The Polygon blanket hexagons are worked from the outside edge to the centre, with 6 decrease lines.

Let’s see how they all look, in the context of a paired increase line, worked every second row or round.
Paired Single Decreases:
This series of swatches shows the effect of working ‘paired’ decreases; one on either side of a marker, with, and without, stitches in between. I’ve used k2tog (knit 2 stitches together) and ssk (slip, slip, knit 2 stitches together through the back loop) decreases. If these types of decreases are new to you check out our k2tog tutorial here or our ssk tutorial here.
Depending on what specific decrease you work before and after the marker, the effects are subtly (or sometimes strikingly) different. Which do you prefer?


You can work a decrease line with a single knit stitch between the decreases:


When you work the decreases one after the other, with no ‘buffer stitches’ between, you get a bit of a ‘gap’ effect.


Show me some different decreases
Ssk and k2tog decreases aren’t the ONLY options. In place of the left-leaning ssk, you can also work sl1-k1-psso (slip 1, knit 1, pass slipped stitch over), or you could work a k2tog-tbl (knit 2 stitches together through the back loop). They both also create a left-leaning decrease.
If sl1-k1-psso is new to you check out our sl1-k1-psso tutorial here. If you’re not sure how a k2tog-tbl works check out our k2tog-tbl tutorial here.


Decreases on the wrong side of the work
While it’s more common to decrease on the right side (or knit side) of the work, sometimes you need to decrease on the wrong side (or purl side)…but you still want it to look good on the right side too!
For these swatches I’ve used a p2tog (purl 2 stitches together) and p2tog-tbl (purl 2 stitches together through the back loop). For more information on these decreases check out our p2tog tutorial here and our p2tog-tbl tutorial here.


In the yellow swatches above I’ve worked a p2tog (purl 2 stitches together), then purled 1 stitch, then worked p2tog-tbl (purl 2 stitches together through the back loop). On the right side of the work this is the same as k2tog (knit 2 stitches together), k1, ssk (slip slip, knit 2 stitches together through the back loop).


In the pink swatches above at the I’ve worked a p2tog-tbl, purled 1 stitch, then worked a p2tog. On the right side of the works this is the same as an ssk, k1, then k2tog.
Central Decreases:
This next series of swatches shows the effect of working ‘central’ decreases; or double or more decreases that ‘stack up’ one over the other.


More rapid decreases
If your pattern calls for a more rapid decrease, you can work double decreases, like an sssk (slip, slip, slip, knit 3 stitches together through the back loop), or a k3tog (knit 3 stitches together).
If you’re not sure how to work these stitches check out our k3tog tutorial here or our sssk tutorial here.


Some patterns have even more extreme decreases!
In the Kaleidoscope blanket the chevron shape is created by working an extreme central quadruple decrease, creating a strong centreline to the pattern. This decreases is a sl3-k2tog-p3sso (slip 3 stitches, knit 2 stitches together, pass 3 slipped stitches over). Check out our sl3-k2tog-p3sso tutorial here.


Decreases in pattern: Stripes
Sometimes you want to make sure your chosen decreases will work with your pattern. Here I’ve worked a few swatches to see which decreases I like best with both 1-row stripes and 2-row stripes.


There’s More Than One Way – choose your favourite, and experiment!
The moral of the story is that just because the designer used a boring detail (ahem… I would never do that right?! Wrong… we’re always using boring basic details!)… that doesn’t mean YOU need to. Try different thing until you find the decreases that suit YOU.
Increases
Looking to learn more? Check out our increases lines post here.
New tutorials, right to your inbox!
We’ll write you a note a couple times a month to share our new knitting tutorials, patterns and stories!

: slip 1, knit 1, pass slipped stitch over")

July 30, 2024 @ 4:51 pm
Such useful information,thank you.